Four times the cake
by thebaking
There were five birthdays, all around the same time.
A cake was in order.
Two limitations.
One: I only have two cake pans and didn’t want to make three batches of cake to make five layers.
Two: A five layer cake – with five standard-ish layers of half a batch of cake batter each – would have been too tall fit in my cake carrier.
A four-layer cake it was.
Here’s what the final product looked like, covered in chocolate icing:
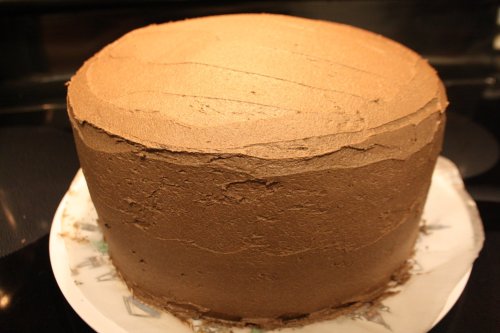
Icing recipe and icing tips here and here.
Instead of just the usual chocolate cake – which seems to go over well with most people – I decided to alternate layers of chocolate cake with layers of vanilla cake.
The vanilla layers also had a pop of colour as a fun surprise.
For vanilla cake, follow all of the pan prep, pre-heating, and order-of-ingredients instructions on the cake post linked here and above. And, for ingredients:
-2 1/4 cups all-purpose flour
-1 cup sugar
-1/2 cup oil, I used canola oil
-1 1/2 cups water – you can use another liquid, like coffee, but be careful about flavour and viscosity and, you know, common sense and obvious stuff
-1 teaspoon salt
-2 tablespoons cornstarch or arrowroot powder
-3 1/2 teaspoons baking powder
I used purple food pigment gel to dye the vanilla layers purple.
A note about water: Gradually add additional water or another liquid to the batter before baking if it is too thick. I find that the ideal cake consistency is somewhat like that of a thick syrup. Think chocolate. Or maple. For this cake, I started with 1 1/2 cups water and added a little additional water, about 1/4 – 1/2 of a cup – after the ingredients had been mixed and blended.
Mix all ingredients together in a large bowl and blend with a mixer, hand or electric, for about two minutes. Remember to stop and scrape the sides of the bowl.
Pour into greased and floured cake pans and bake at 350 degrees for about 30 to 35 minutes – or until a toothpick stuck into the centre of the cake comes out clean.
Remember that, once baked, cake needs to fully cool before being removed from cake pans. If, like I do, you have a limited number of cake pans, you need to let each batch of cake you bake cool fully before removing it from the pans and baking a new batch.
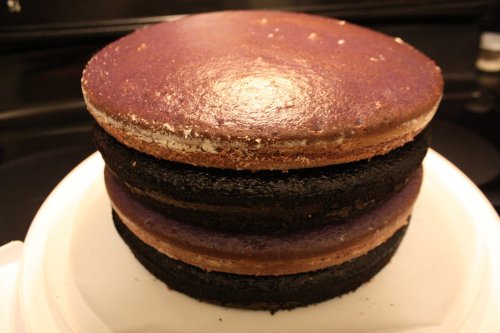
Here’s the fully-cooled and ready-to-ice cake, sitting on my cake carrier base to make sure it wasn’t too tall to fit:
And a close-up of the texture of both the vanilla and chocolate layers:
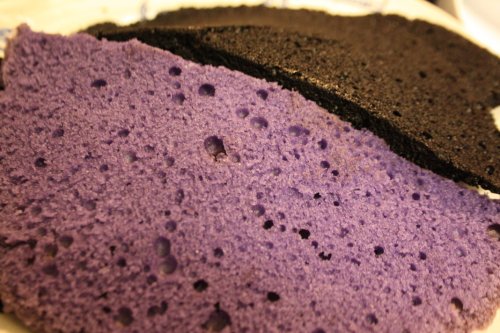
These pieces came from the trimmings I made on the top of some of the layers to flatten them and make them fit more closely together.
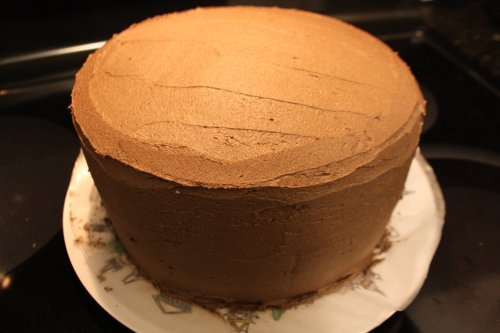
And another close-up of the final product:
This cake did get a bit of additional icing decoration – but that happened on-location, not in my kitchen – and a picture didn’t happen.
The cake was thoroughly nom’d.
Cheers.
